
If you’re anything like us, chances are you have your phone with you pretty much at all times. That’s why we want to make sure our phone case is something we love to look at. Luckily for us, creating a custom phone case in PicCollage is as easy as 1, 2, 3!
Using our favorite photos, stickers, and backgrounds, we can quickly and easily design a case that is totally unique. Here’s how you do it:
Step 1: Choose a background
Browse our collection of fun background packs to see what catches your eye! If you are a minimalist, you could even create a cool phone case that just uses one of our hundreds of background patterns on its own. Or you could take one of your fave photos, set it as the background for your collage, and add to text or stickers.

Step 2: Add photos
Add a photo of something that will make you smile! You can add something from your camera roll or you can use our “Web Search” tool to search for something online. For this example, we chose donuts because… they’re donuts, duh.
Here’s a pro tip: if you’re looking to find an image that doesn’t have a big white box as a background, add the word “transparent” after your search term.


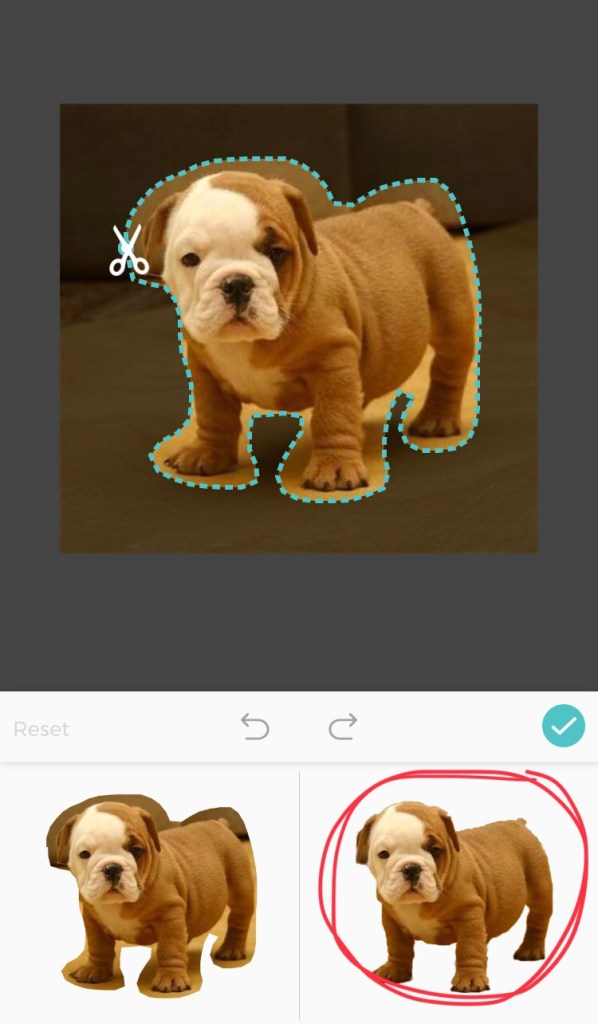
If you want to use an image from your camera roll, add it to your collage and double tap on the photo to select a “Cutout” effect of the image. Use your finger to trace around the part of the image you want to add to your collage. After tracing around the image that you want on phone case, two results will appear below it. The first is a cutout of exactly what you traced. The second is PicCollage’s smart technology that clips out the image according the edges that it detects on the “object”, giving it the effect of being a sticker.
Step 3: Choose stickers to add personality
Speaking of “stickers”, this is a great way to add some a little something extra to your collage. We added some from our free PicCollage starter pack.


Step 4: Turn your collage into a phone case
Once you’re happy with your collage, tap the DONE button, then select PRINT…


You have now entered the phone case check-out process, so just follow the instructions and NEXT buttons to make your purchase.
Step 5: Enjoy your custom case!!
